Setting up Google Ads Conversion Tracking is crucial for any advertising agency to effectively run ads.
Setting up conversion tracking in Google Ads helps:
- measure campaign effectiveness
- clean up conversion attribution
- bring down cost per click
You can use Google Tag Manager to set this up.
Where do you start?
Watch our Google Ads Conversion Tracking For Advertising Agencies video below or follow along through this post!
1. Open Google Tag Manager
- Make sure you have the right access to create and publish your tags.
- Go to Admin →
- Click User Management (the one on the right) →
- Click the three dots next to your account/email →
- View user’s account details →
- Click dropdown arrow →
- Click the pencil next to your client’s “container” →
- Give yourself Publish, Approve, Edit, Read access

If you can’t make those access changes, contact whoever is listed on the account as an administrator (click User Management on the left side of the Admin page to see who that is). It’s probably your boss or client. Ask them to complete those steps for you.
2. Create a Google Ads Conversion Linker Tag
- Go to Workspace → Tags.
- Click “New” in the top right.
- Name your tag “Conversion Linker”. You’ll see why in a second.
- Click the “Tag Configuration” box. Under tag type, click “Google Ads”, then choose the “Conversion Linker” tag type.
- You need this tag before making a conversion tag. It’s what Google Tag Manager and Google Ads use a Conversion Linker to measure click data and attribute conversions.
- Click the “Triggering” box, then select “All Pages” as your trigger. We want this to fire on all pages, even if your conversion only takes place on certain pages.
- Click “Save”.

3. Create your Google Ads Conversion Tag.
- Click “New” in the top right again.
- Name your tag. We usually start with “Google Ads – “ then the conversion type. An example is “Google Ads – Purchase”.
- Click the “Tag Configuration” box. Select “Google Ads” again, but this time, choose the “Google Ads Conversion Tracking” tag type.
- You will see a bunch of fields appear under the tag. The ones we need to fill out are Conversion ID and Conversion Label.
- We will get the Conversion ID and Conversion Label from Google Ads.

4. Open up a new tab with your client’s Google Ads account.
- Make sure you have the right client selected. We’ve made that mistake before.
- If you’re using the new layout of Google Ads, click “Goals” on the left sidebar.

If you’re using the old layout, click “Tools and Settings” in the top nav bar, and click “Conversions” under the “Measurement” column.

- Click “New Conversion Action”.
- Click “Website” for the type of conversion you want to track.
- Enter your client’s domain.
- After it scans, click “Add a conversion action manually” in the new box that shows up.
- Fill out the boxes. More info on that:
- Select a category that makes sense for the conversion. It’s pretty much common sense. If it’s a purchase, select purchase. If they fill out a form, “Submit Lead Form” will work.
- Name your conversion something relevant, like “Purchase”, or “Form Submission”. We usually add “- Google Tag Manager” to the end so we know we set it up in Google Tag Manager, and not natively in Google Ads.
- For the “Value” box, pick what makes sense:
- If it’s ecommerce, you want a different value for each conversion, because your client probably has multiple products.
- If your client only has one product, you can use the same value for every conversion.
- If this conversion isn’t ecommerce and has no monetary value, don’t use a value for it.
- Here’s a screenshot of our layout for a purchase event.

- For “Count”, we keep “Every” selected for ecommerce conversions, and “One” for non-ecommerce stuff.
- Leave the other boxes the same. These are our settings when we set up for clients.

- Click “Done”. Click “Save and Continue”.
- For setup, click “Use Google Tag Manager”. This is where you get your Conversion ID and Conversion Label. Here’s a screenshot.
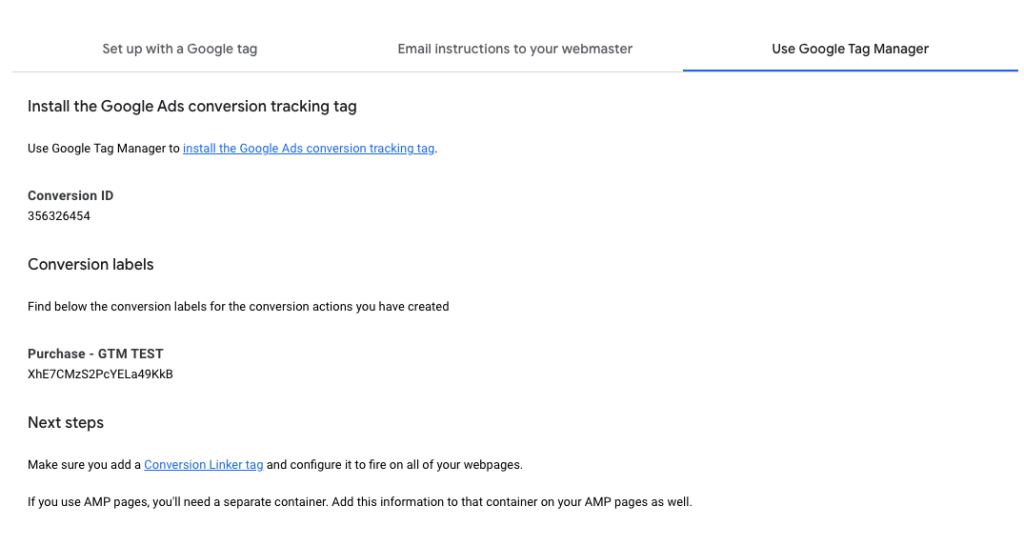
14. Copy those over and insert them into the open fields in your Google Ads tag on Google Tag Manager.

- Leave the other three fields empty. If you’re doing ecommerce tracking and your data layer is set up right, you shouldn’t need to enter a parameter into that “Conversion Value” field. Just cross your fingers and pray to God on that one.
- If this is an ecommerce conversion, select the “Provide product-level sales data” box. It’ll send specific product info like what’s explained in the below screenshot.

5. Set up your conversion trigger.
- The trigger defines what condition(s) need to be met in order for this tag to fire. It’s the stuff an user has to do in order to qualify as a “conversion”.
- Whether it’s an add to cart, purchase, form submission, or button click conversion, you need to attach the right trigger to make sure your tag fires and sends off data to Google Ads.
- There are so many ways to build a trigger. How you build it depends on the conversion, the data coming into Google Tag Manager from your client’s site, and general user behavior.
- We recommend going to YouTube to look up how to build different triggers like button clicks, link clicks, form submissions, or custom events.
- Here’s an example of a purchase trigger that fires when the data layer receives a “purchase” event from your client’s storefront “Shopify, WooCommerce, etc.)

- When your trigger is built, save it. Then, click “Save” in Google Tag Manager, and click “Done” in Google Ads. You should see your new tag show up in Google Tag Manager, and your new conversion action show up in the “Goals” section of Google Ads.
6. Test your tag to make sure it works.
- Click “Preview” in the top right corner of your Google Tag Manager workspace.
- Enter your client’s domain, deselect the little “Include debug signal…” box in the bottom left, and click “Connect”.
- If Tag Assistant doesn’t connect, and you see the page you’re on in the left sidebar is greyed out, it means the Google Tag Manager container code isn’t installed on your site. Here’s a video on how to have your developer install that on WordPress. Go search on YouTube for a Shopify tutorial if your client uses that.
- We are almost done setting up Google Ads conversion tracking for advertising agencies. I had to write that for SEO.
- You can also confirm this by going to your client’s site, right-clicking anywhere on the page, clicking “View page source”, and using the Command-F function to search for “GTM-(your container ID)”. If you don’t get any results, it’s not on the site.
- When Tag Assistant does connect, go test your Google Ads Conversion Tracking tag.
- Act as if you’re a user. Go submit that form, click that button, add a product to your cart, or run a test purchase on your boss’ credit card.
- When you’re done with that, click back into that Tag Assistant tab.
- Using the left sidebar, navigate to the action you performed that should have completed the conversion. Sometimes, you have to comb through.
- When you find the click/page view / custom event that should have fired your tag, select it, and make sure your Google Ads tag appears under the “Tags Fired” section.
- If it’s under the “Tags not Fired” section, your trigger probably doesn’t work. You can click the tag and it’ll show you which conditions of your trigger were and were not satisfied.
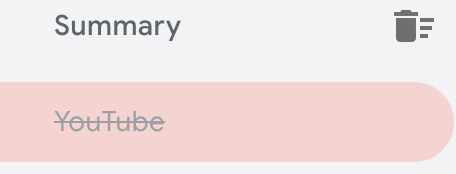
- You can also click the “Summary” text on the left sidebar to see a list of all the tags that fired during your session. We don’t recommend using this to check, because your tag might have fired at the wrong time, and this page wouldn’t tell you when/where it fired.
- If your tag works, you can close out the Tag Assistant and test session tabs. You have now set up Google Ads conversion tracking for advertising agencies.
- Here’s an example of our Google Ads tag firing for a client on a form submission.

7. PUBLISH YOUR CONTAINER
- In order for the new tags/triggers you made to actually work on the site and send data to Google Ads, you need to publish your Google Tag Manager container.
- In the top right of your Google Tag Manager workspace, click “Submit”. Name your container version and describe what you did. It makes it easier to go back and remember what you changed, or go back to a previous container if you mess up.
- Click “Publish” when you’re ready.
This is how you set up google ads conversion tracking for advertising agencies.
If you have any questions, leave a comment below and we can get back to you or set up a quick meeting and help you out.
We’re in the early stages of building a comprehensive program that teaches digital agencies how to set up and manage all of their data tracking using Google Tag manager.
If you want to join the waitlist and get early access, leave a comment below and we’ll let you know when we’re closer to finishing up.